How to create an IDV check to send out to multiple individuals.
If you wish to perform an IDV or Peps, Sanctions and Adverse Media check on multiple individuals, the bulk check feature allows for a time-saving method of sending these out.
For more information on what exact type of IDV & AML check to perform, please read the IDV & AML articles on our Frequently Asked Questions page.
Creating a CSV
In order to perform this feature, a CSV Excel spreadsheet is needed with some relevant information on the individuals you wish to check. A sample of the format needed can be found in the pop-up menu for creating bulk checks.
The relevant information needed includes each individual's first, middle, and last names, their date of birth, and their email address and mobile number. The bare minimum requires the individual's first and last name and an email address.
Creating the bulk check
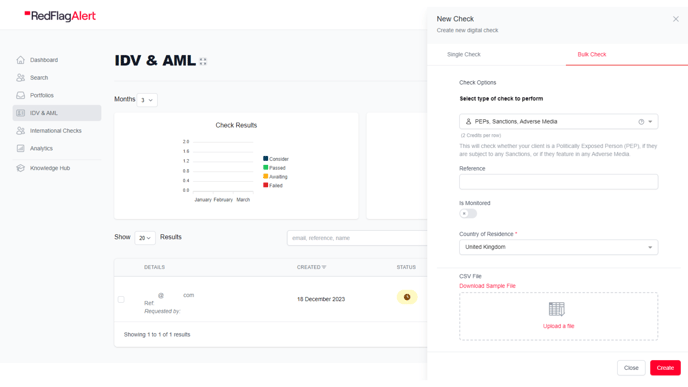
Once you have a CSV created, head to the IDV & AML page located in the main Red Flag Alert dashboard. From here, click on New Search in the top right. A pop-up menu will appear as if you are performing an individual check. At the top of this menu, click on Bulk Check.
A similar menu will be shown, this time with fewer options to choose from. In a bulk check, there is only the ability to perform an IDV check, a Peps and Sanctions check, or the two together.

As with performing a single check, there are fields present that allow you to input an internal Reference, a Message to the Customer, and the country of residence. If you have a list of individuals from various countries, it is recommended that you group them into separate CSVs based on this data point.
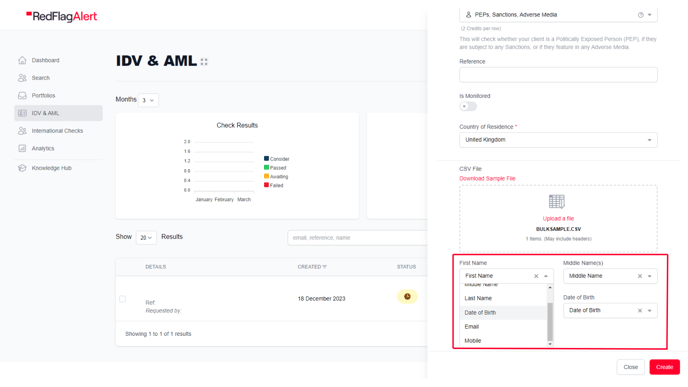
Below this is an area for you to upload your CSV file. This is done by clicking on the Upload a File button and then choosing the relevant file from your computer. Once the system has finished processing the file, more data fields will appear and a number will be displayed for how many items have been registered. It is worth noting that this number may include headers in the CSV, so might be one number more than anticipated.

The data fields that appear here will allow you to map the data on the CSV. Each drop-down menu needs to be selected and the relevant column name needs to be chosen to match the field name.
Once this has been done, the bulk check is ready to be sent off by clicking on the Create button.
